Anyone who follows my photography should know that I am not really a backpack kind of guy. The reason I shoot with Olympus Micro Four Thirds equipment is because I want to travel as light as possible and whenever possible remove the need for a backpack. Instead of a backpack I use the Cosyspeed Camslinger system. This is great when I’m not going far from the car and I can carry my tripod in my hand, but what about when hiking?
My quest for a backpack started squarely with the ability to carry my tripod with the weight evenly distributed
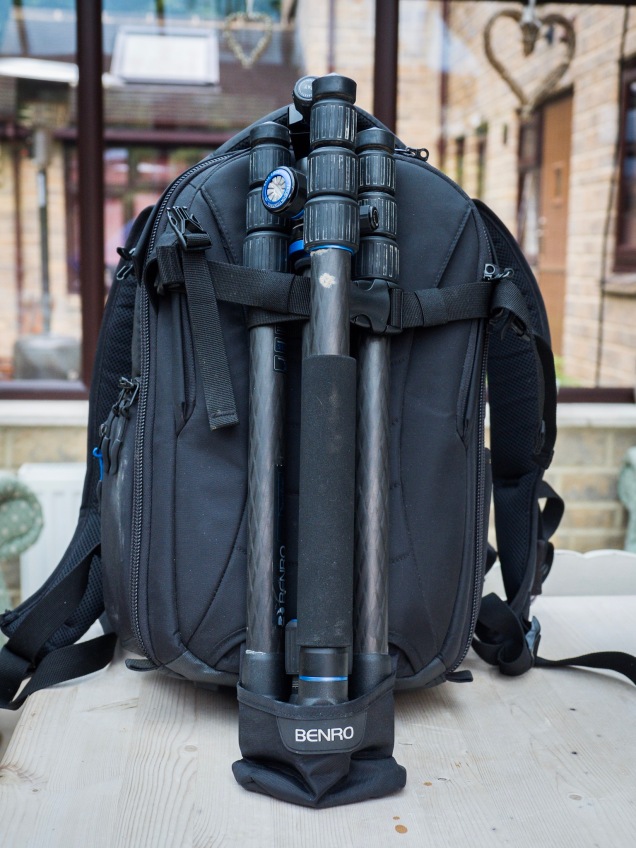
I have to be honest, my search for a backpack started from the premise of wanting to be able to easily carry my tripod on my back and I searched around for some kind of dedicated tripod holder that simply held the tripod and distributed the weight evenly across my shoulders. I could find nothing online and after a fruitless day searching at The Photography Show last March I found myself chatting once again to Mark Hoskins on the Benro stand. Now, it’s no secret that I use and love the Benro Travel Angel tripod (see review) so I asked Mark if they did anything that matched my requirements. “I’m afraid not”, he said. “Well”, I replied, “I’d be happy to go for a small bag, as long as it’s light and the tripod is carried in the centre and not on the side!”. Why do bag manufacturers do that? Are they trying to cause the user back problems? Do Manfrotto and Lowepro own shares in a global chiropractors? To me it’s simple, the weight of a backpack should be distributed evenly and it can’t be if they force you to shove a 2kg lump of carbon fibre on one side!
Mark listened to my rantings and then gently led me to their new backpack range display where he handed me the Ranger 200. That was 6 months ago and I have been using the backpack regularly ever since, so what’s my verdict?
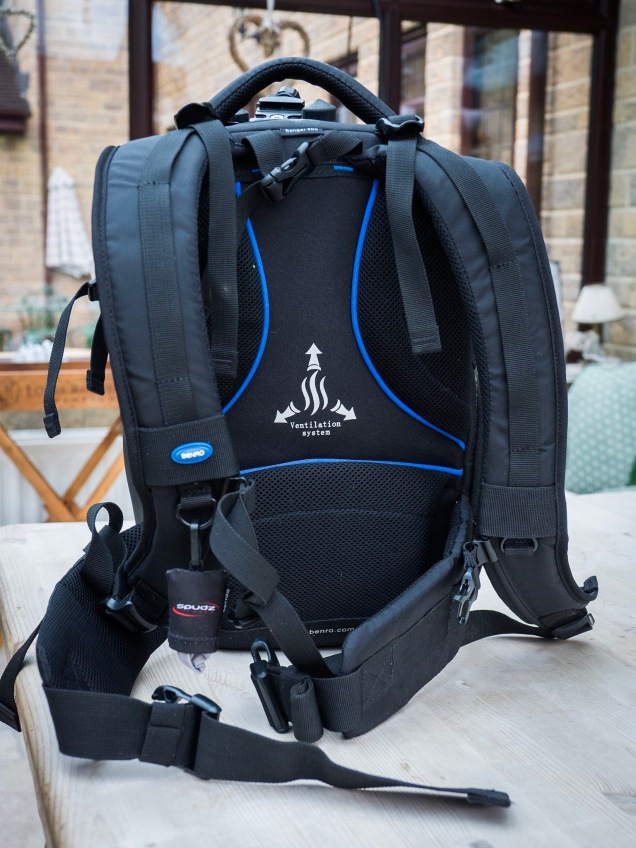
The Ranger 200’s airflow system does a pretty good job of keeping the sweat off your back whilst the cross straps keep it securely on there.
Qauality
Before we get into the nitty gritty of whether the bag is actually any good or not let’s address the quality. At £129 it’s not the cheapest backpack on the market but then it’s not the most expensive either and the quality certainly lives up to the price tag. It is manufactured from water-repellent nylon with soft lined internal compartments. The dividers inside are adjustable and Benro describe the zips as “durable” which I have found over 6 months use to be true. I have mistreated the bag quite badly since I received it and apart from being a little grubby it is still as it was the day I bought it. In short, the quality is superb.
Fitting It All In
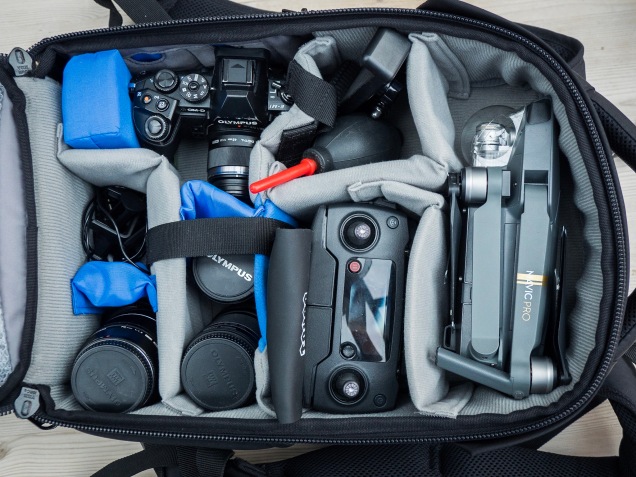
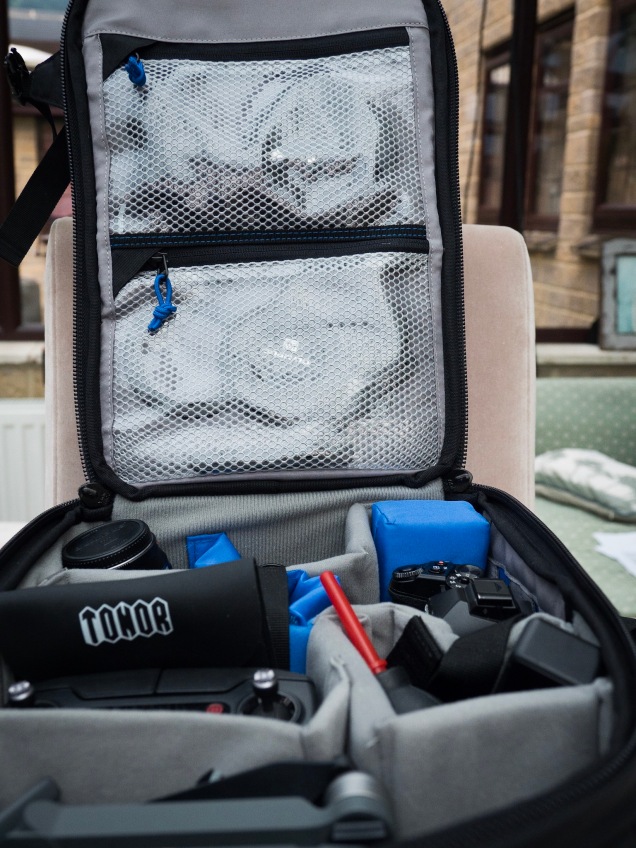
The Ranger 200 is small and lightweight but really packs a punch in it’s carrying capacity. Weighing just 1.4kg it’s exterior dimensions are 27 x 46 x 32 (W x H x D) cm. This gives a really good carrying capacity, even for DSLR users, and as can be seen below I have managed to pack a lot in, including a spare Olympus E-M1 body with lens attached, spare lenses and my Mavic Pro with 2 spare batteries. There are 2 interior zip-close storage compartments for all those little things such as batteries, cables, etc that just don’t fit anywhere else.
Despite being a pretty compact and lightweight backpack the Ranger 200 can still hold a spare body and lenses as well as a Mavic Pro drone and spare batteries, plus much more.
The dividers, which attach to the walls of the interior with Velcro, are of various shapes and sizes and can be configured to suit your individual requirements.
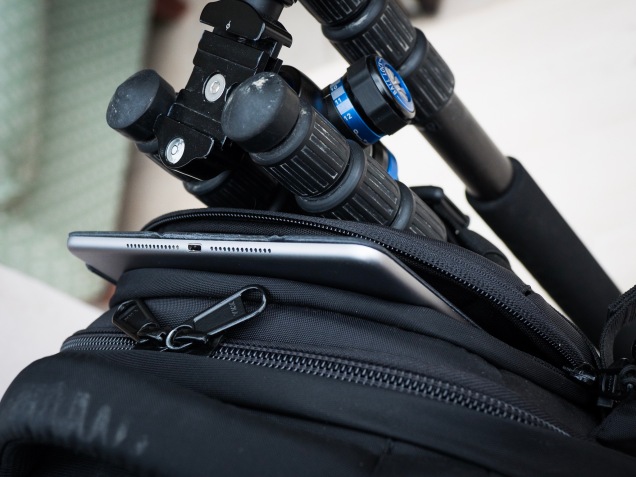
There is also a padded front pocket for a small laptop or iPad. My iPad fits in it beautifully but my 15″ Macbook Pro won’t. This isn’t an issue for me because Lightroom Mobile is now so good that I pretty much do all of my post processing on the iPad and never take my Macbook out of the house. I reckon a 13″ Macbook would probably fit in.
As I do just about all my post processing on my iPad these days the ability to slip that in a pocket on the Ranger 200 is an added bonus.
Externally the tripod is carried (fanfare please) centrally and sits securely in a little pouch that can be tucked away when a tripod is not being carried. An adjustable strap secures the tripod at the top and I can even tuck my drone landing pad in the tripod with no problems.
In Use
The first thing to say about using the bag is that when fully loaded and on your back the weight is distributed extremely evenly. I don’t want to sound like a broken record but this is really important. It’s incredibly bad for your back and shoulders to have unevenly distributed weight. Not only that but your backpack will become less comfortable much more quickly if it is pulling to one side.
The Ranger 200 features a ventilated padded harness system with plenty of adjustment and cross straps to ensure that the harness straps stay securely on your shoulders. I have to say that it all works extremely well and I have found the fully loaded bag to be incredibly comfortable for long periods. Although the Ranger 200 is water-resistent Benro have also included a rain cover.
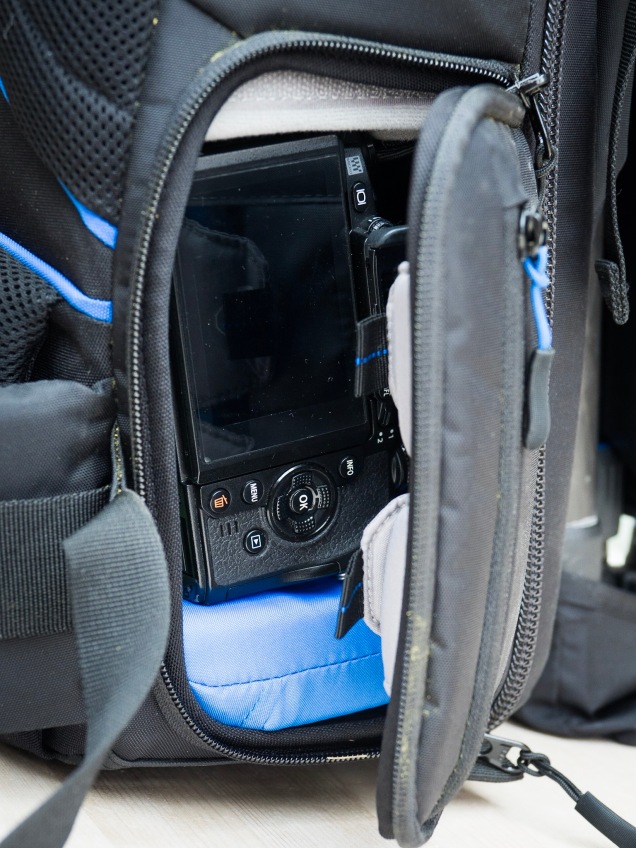
At the bottom of the bag is a water-resistent pad that it sits upright on meaning you don’t need to lay it in the mud every time you take it off. On the right-hand side is a quick access opening to allow you to grab your camera. There are a couple of little pockets inside the flap for SD cards. On the left-hand side there is an open elasticated pocket that will hold a small water bottle or similar.
There are plenty of pockets for storing those bits and bobs that just don’t belong anywhere else
Verdict
All in all the Ranger 200 is a well made, well thought out backpack that I am extremely happy with. I have been very careful to make sure I have really used this backpack and properly put it through it’s paces before reviewing it and now having used it for over 6 months I can definitely say that in my opinion it is well worth the money. It fulfils my criteria but I realise that everyone is different. Is it the right backpack for you? I can’t say but what I can say is it’s definitely worth serious consideration.
Despite carrying my main body round my waist rather than in my backpack I am surprised how often I have accessed my spare through the handy side opening.
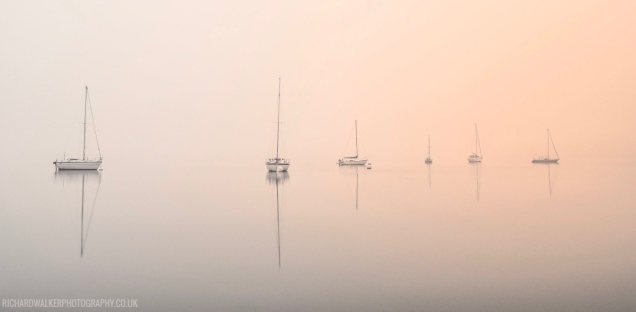
Windermere Morning – Winner of the Olympus Global Photo Contest 2017
A few days ago I received an email telling me that my photo “Windermere Morning” had won the Olympus Global Photo Contest 2017. Apart from the kudos that this brings as well as the nice shiny new Olympus camera and lens, it also affords an opportunity to share my thoughts on why my particular photo may have won.
I did consider calling this article “How To Create An Award Winning Photo”, but then I realised that I have no idea how to do that. I simply took a photo that won a competition and I am fully aware that this is very different.
Lesson 1: You’ll never get the shot if you don’t get out and shoot!
Interestingly this shot very nearly didn’t happen. I was staying at a hotel right on the edge of Lake Windermere in the UK Lake District and had set my alarm for just before sunrise. When I woke I could hear rain tapping on the window and I was very tempted to just stay in bed. Luckily after a few minutes I told myself that is not the attitude of a landscape photographer and dragged myself out of bed and down to the lakeside where I was greeted by the scene in the photo.
Just imagine if I had stayed in bed. Things would have been very different.
Lesson 2: The Right Equipment Is Important. The Best Is Not.
Now let’s get this straight. In my opinion, if you are really interested in taking great photos you should invest in the best possible equipment that you can afford. Sure you can take great photos with a phone these days but what a really good camera and a really good lens allows is consistency. The better your equipment the more consistent your images will be. To a point. What my win proves is that whatever the reviews and camera shop sales people might tell you, you do not need a top of the range DSLR to take an award winning photograph. Despite the competition being run by Olympus it was open to entries shot with any make and model of camera. I happen to use Olympus but the more important point is that I use a mirrorless micro four thirds camera rather than a DSLR because that is what suits me for various reasons. Photography snobs the world over will tell you that you can’t shoot landscapes with micro four thirds. Well, I am proof that they are wrong.
This shot also happens to have been taken with a relatively cheap lens, certainly not one from Olympus’ Pro range, but it was clearly up to the task in this instance, as I knew it would be as I stood on the edge of the lake. But just as important as the camera and lens were the peripheral items. I could not have shot this without a good sturdy tripod. I personally use a Benro Travel Angel but the important thing is that you have equipment, such as a tripod that you are comfortable using and that you trust. Get to know your equipment inside out so that using it becomes second nature. That way when you have crawled out of bed in the wee hours against your better nature you may just get set up and ready in time for the shot, rather than fiddling with your equipment trying to remember how it works.
Lesson 3: Spend Time At Your Location
As eluded to earlier I very nearly didn’t get out of bed on the morning I shot this but once I did was important to maximise the opportunity that being in one of the most beautiful parts of the world affords you. I spent a good hour walking around the scene, weighing up the angles, monitoring the light and taking lots of photographs. From this position alone I took at least 20 photos as the ever changing light and conditions worked their magic. I also moved up and down the shore shooting the scene from different angles, sometimes shooting high and sometimes shooting low, sometimes adding foreground interest, sometimes removing it. I literally had no idea that this would be the shot that I would go with until it was on my computer and edited. I had seen it’s potential but only then did I realise it.
Lesson 4: Capture Something That Moves People
It’s not about being technically brilliant, it’s about creating an emotional connection with your audience. The judges comments when awarding my image first place were:
“The world can be a loud, fast, chaotic place. This location, free from troubles is the paradise that the modern person longs for – a place away from their busy lives. When the mind is at peace, ideas naturally come to us.”
That is why it won. He obviously felt a connection with the serenity of the scene. Remember, I am not responsible for that serenity, that was all Mother Nature, I was simply there to capture it, but when I was doing that I could see that it was a scene that would tug at people’s heart strings, because it tugged at mine. Since it won there have been a lots of comments on my various social channels and not one has said, “wow, it’s so sharp”, or “I love the leading line of the boats”. All the comments, and there are hundreds, have been about the serenity and the beauty or simply just how much the person loves that part of the world.
Lesson 5: You Have To Be In It To Win It
OK, this one may seem a bit obvious but it is amazing how easy it is over-looked. If you don’t enter a competition then you won’t win. Simple as that. But how do you know you’re good enough to enter? Well the easy way is to get feedback from your peers. Post your best (and I mean your very best) images on social media channels and photo sharing sites such as Flickr and 500px. If you don’t get any likes it should be a warning that you’re probably not ready to go for the big prize just yet. Have a look around these sites. Look at photos you admire and see how many likes they are getting. If you get to a stage where you are in the same ball park then that is a pretty good indication that your shots may just be ready for the big time.
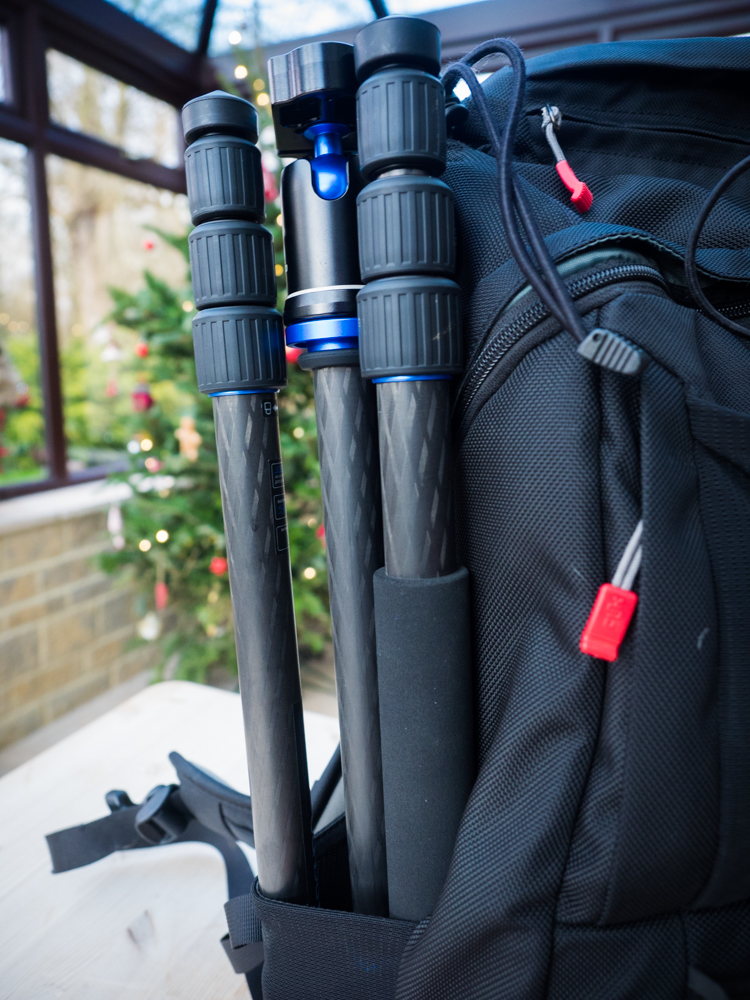
Tripods are probably my least favourite thing in photography. For me a tripod is a necessary evil, a piece of gear that needs setting up, wasting shooting time, and takes up valuable space and adds too much weight to my bag. Sometimes I wish I did’t need to carry a tripod at all and indeed sometimes I can go a whole day walking in the mountains and not use it once, yet there it is, on the side of my backpack weighing me down and making me resent it bitterly.
Of course, sometimes my tripod is my best friend and for that reason I always have one with me, but, I refuse to allow a tripod to take over and for that reason I only use travel tripods and my search for the perfect travel tripod has now brought me into a relationship with the Benro FTA18C Travel Angel. But, have I finally found my perfect partner? Well, before I answer that, let’s talk about the tripod itself.
A 32 second exposure shot using the FTA18C Travel Angel on a gusty day proving it’s stability credentials. You can see how this shot was created and edited in the video below.
QUALITY
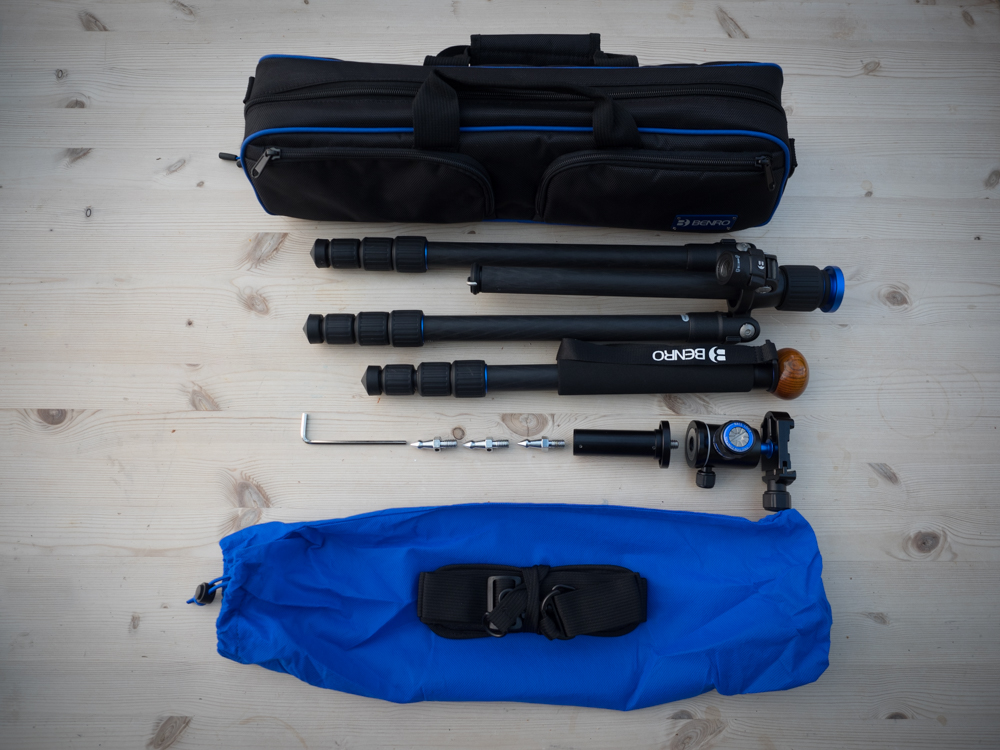
The first thing you notice when you unpack the FTA18C from the packaging is that it oozes quality. From the blue anodised finish on various parts through the magnesium castings to the sure feel of the twist locks this feels like a classy piece of gear. It comes in a bag that is inside another bag that has a detachable handle. That’s all I’m going to say about the bag(s). If you are the sort to carry your tripod in the bag it comes in then you now know it comes in a bag, 2 bags in fact. I, however, carry my tripod on the side of my backpack and therefore the bags will never be touched by me again.
The Travel Angel comes with not one but two bags, plus a few nice little extras
WEIGHT
Being a grumpy old curmudgeon who doesn’t want to carry a tripod this one feels like all others I have ever lifted, too heavy. However, pop it on the scales and the figures that pop up make a liar out of me. Weighing in at just 1.5kg complete with ball-head this is a light tripod thanks to its predominantly carbon fibre construction. Sure, I have owned lighter tripods such as the Sirui T-005BX that I have reviewed previously, but the thing is those lighter, smaller tripods are not proper tripods. What you gain in weight saving you lose in stability. The Sirui becomes pretty much useless in a bit of wind, something that is not the case with the Benro. Make no mistake, this is a proper tripod that can stand up to all but the strongest of winds and whilst it may feel too heavy to me when I pick it up, once it is attached to my backpack I don’t even notice it.
IN USE
The FTA18C is simply a joy to use with a quality, reassuring feel and some nice features to make the tedious necessity of owning a tripod just that little bit more bearable. Thanks to the legs folding back on themselves 180 degrees it compacts down to just 44cm in length meaning that it will fit nicely in most photography backpacks. One small thing that is nice about this feature is when you swing the legs round and extend them the tripod is already at its maximum height of 154.5cm with the centre column already extended. Just pop your camera on top and even a six footer like myself is looking straight through the viewfinder without having to bend much at all. Even with the tripod in this fully extended position it feels stable and solid. The centre column is rigid and I could detect no lateral movement of the camera due to it being extended, but, if you do need to retract it this is achieved quickly and easily using a twist grip release and once retracted the tripod still stands at a very respectable 130cm.
The bottom of the centre pole features the obligatory spring loaded hook. Personally I simply do not understand the concept of these. I understand that the idea is you can hang a heavy weight on it such as your bag to aid stability in windy conditions, but I have never felt the need to use one and I can’t help thinking that if it’s windy your weight will blow around and cause more problems than it solves. Any, whatever the pros and cons, the Travel Angel has one if that is your thing.
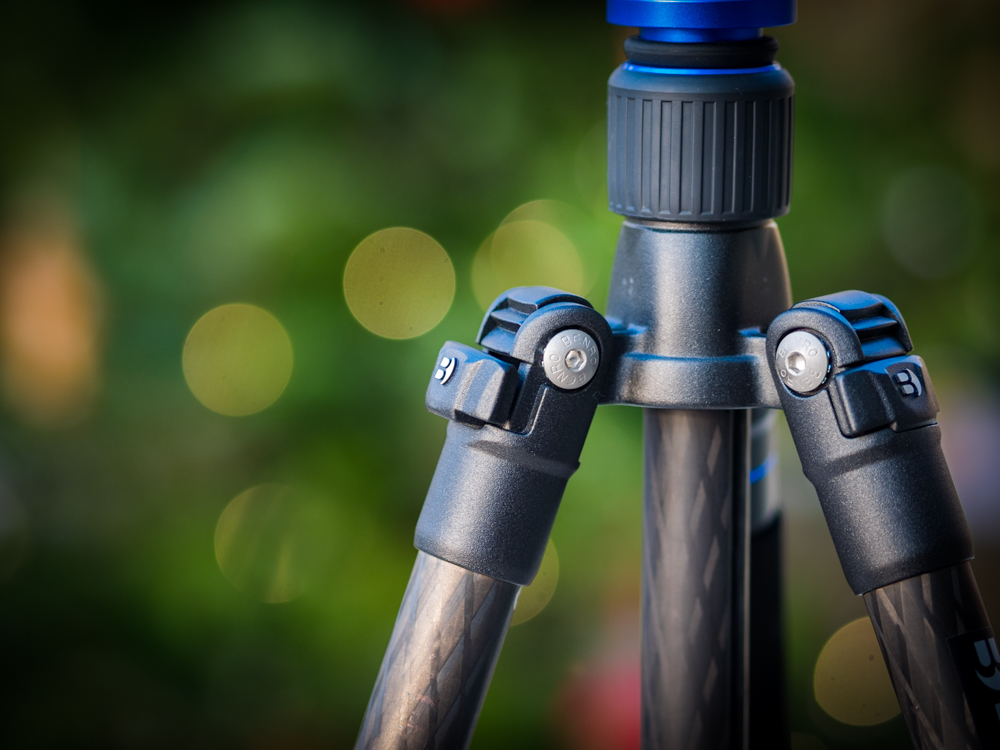
The catches that secure the legs in position are not spring loaded as on some tripods but I actually prefer this. What they are is very solid with a nice positive feel making it a breeze to lock the legs in one of the 3 offered positions.
The leg angle adjustment catches are not spring loaded but have a nice solid feel.
Leg height adjustment is done using dust and moisture resistant twist locks. Now, I know that these tend to polarise opinion, people either love them or loathe them but personally I love them and the ones that Benro employ on this particular model are the best I have used. The legs are 4 section units which means there are only 3 twist locks per leg and all the locks on each leg can easily be grasped in one hand to undo them. It only requires about half a turn before the leg sections extend with ease and tightening the locks again is easy as they don’t need doing up too tight to be secure.
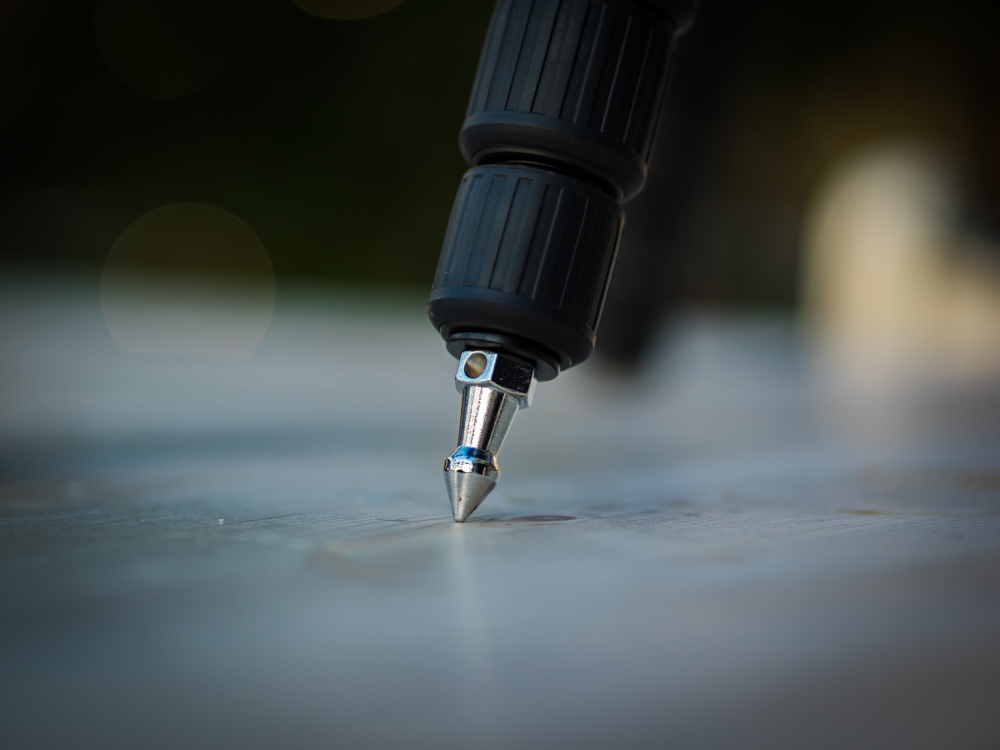
One nice touch is the ability to replace the standard rubber feet on the legs with some included metal spikes. I have taken advantage of this a couple of times now in windy situations and I have found it makes a real difference to the stability. As can be seen in the picture below the spikes have a nut on them to allow them to be tightened with a spanner. Interestingly Benro don’t supply a spanner but do supply an allen key which fits snuggly in the hole and works great for tightening them.
The ability to replace the rubber feet with metal spikes is a nice touch that pays dividends in difficult conditions.
BALL HEAD
So far everything about the Benro Travel Angel has been positive, but as with any tripod it is only ever going to be as good as its ball head, so wouldn’t it be a pity if this crucial part let it down. Well, thankfully it doesn’t. The ball head on the FTA18C is equal to the rest of the tripod and performs well.
The unit as a whole is rated to hold up to 8kg which is a weight that I simply cannot test it to. My whole backpack complete with the tripod in it only weighs 6kg and the heaviest combination I could put together to put on the tripod was my OM-D E-M1 and 12-40 Pro lens which weighs in at less than a kilo combined. With this kit on the tripod the ball head is a pleasure to use. It uses an Arca Swiss style quick release plate which thankfully has a hoop on it for tightening, this is a big plus, too many manufacturers insist on forcing you to utilise a coin or allen key to attach the plate to your camera. This is a pain and Benro have quite rightly made things easy on this front. They have also employed a very nice safety mechanism when attaching the plate to the ball head which stops you accidentally loosening it enough to allow the camera to fall out. Another nice touch.
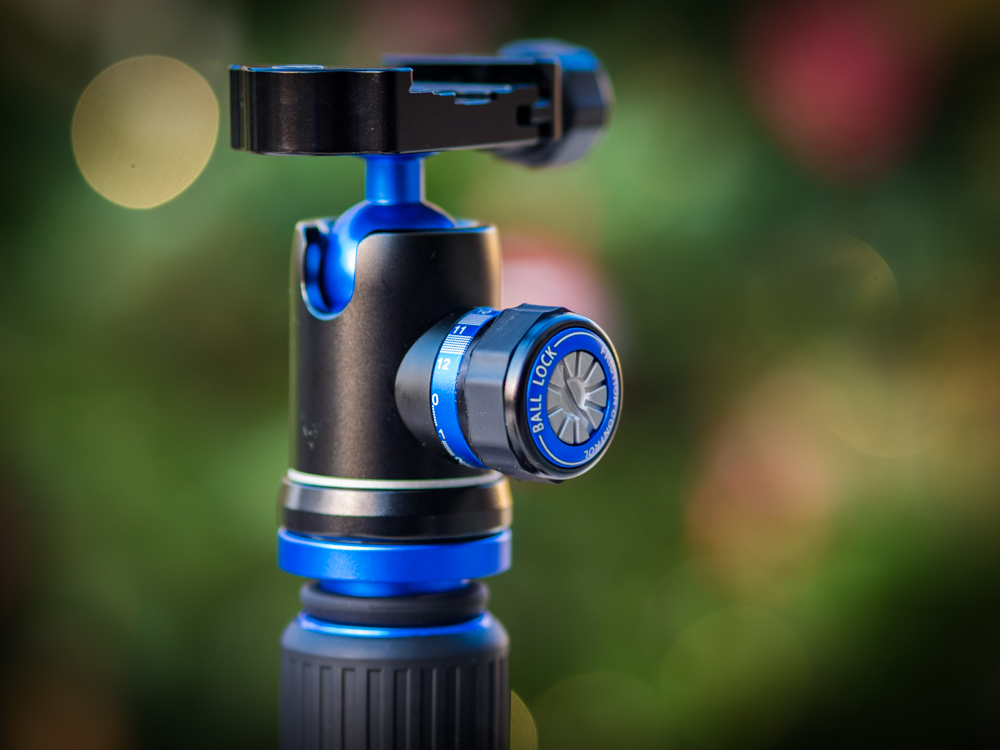
The ball head has just 2 knobs, a pan lock and a combined friction / ball lock control. Both have a nice positive feel and work well and the ball head itself has a nice fluid feel with a good range of movement. The friction / lock control has a nice feature which employs an inner adjuster which allows you to set the maximum it can “open” up meaning that when you unlock the ball you get a consistent feel every time and never get your camera flopping down because you have undone it too much. Another nice touch. Panning is smooth an the lock is quick and secure.
The ball head has some nice features and is smooth and fluid in it’s operation
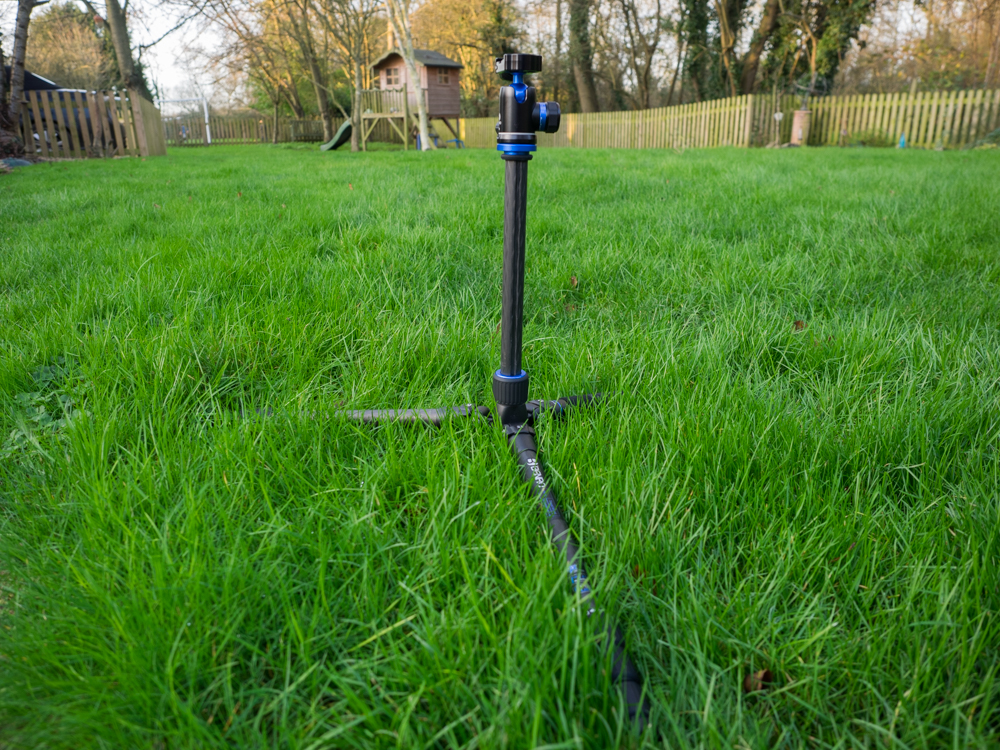
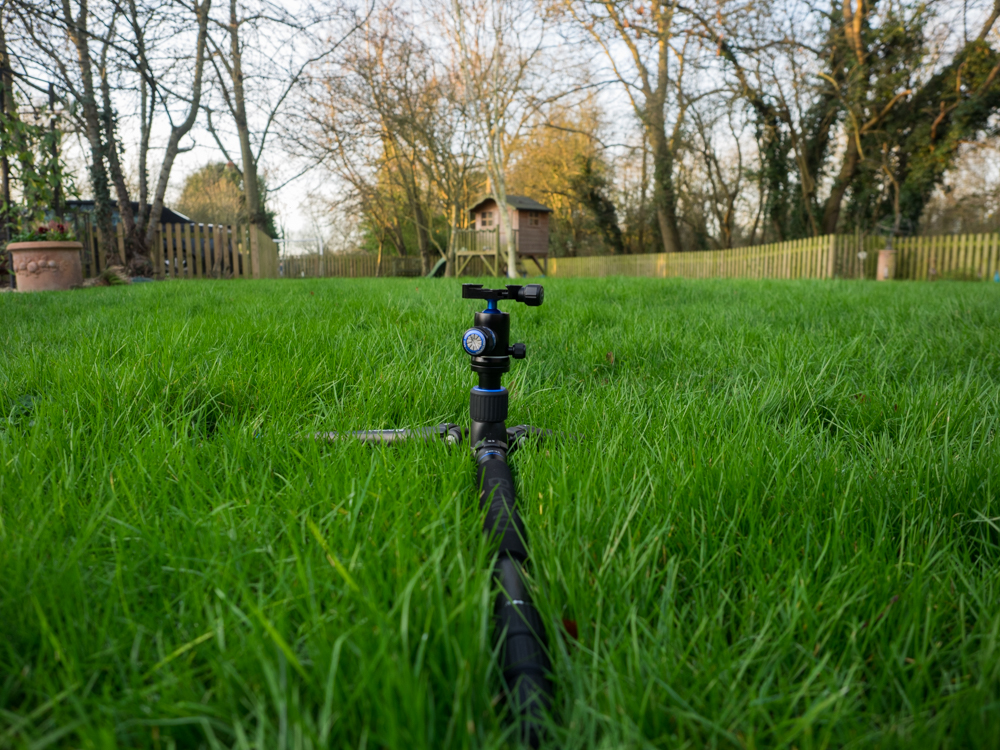
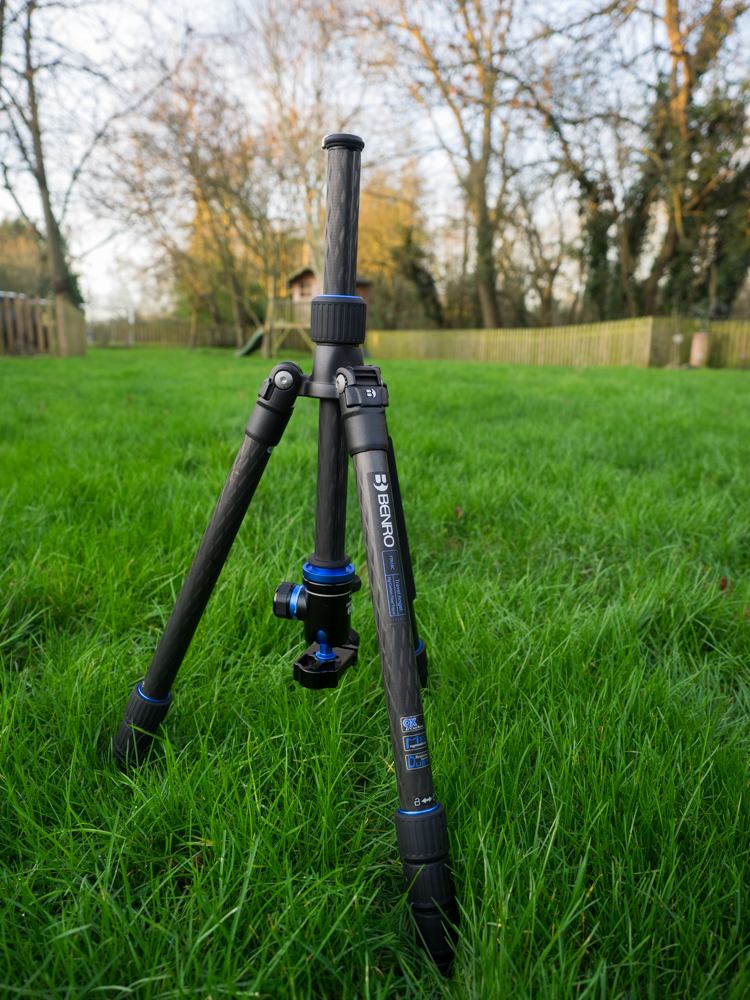
SHOOTING LOW
Benro claim a minimum height of 44cm on their website. This is the height that the tripod stands at if you simply just put the legs at their widest angle, but there are a couple of ways you can go lower than this.
The first way is to remove the centre pole and use the included short centre pole. This reduces the height to 25cm. The second way is to reverse the centre pole and hang your camera upside down. Obviously this makes things a little more difficult for shooting but is certainly a viable alternative if you need to get really low.
With the standard centre column in the Travel Angel can go down to 44cm, but it has a couple of tricks to go lower.
Using the short centre column allows you to get down to 25cm
Reverse the centre column and you can go right down to ground level, but this does mean shooting upside down.
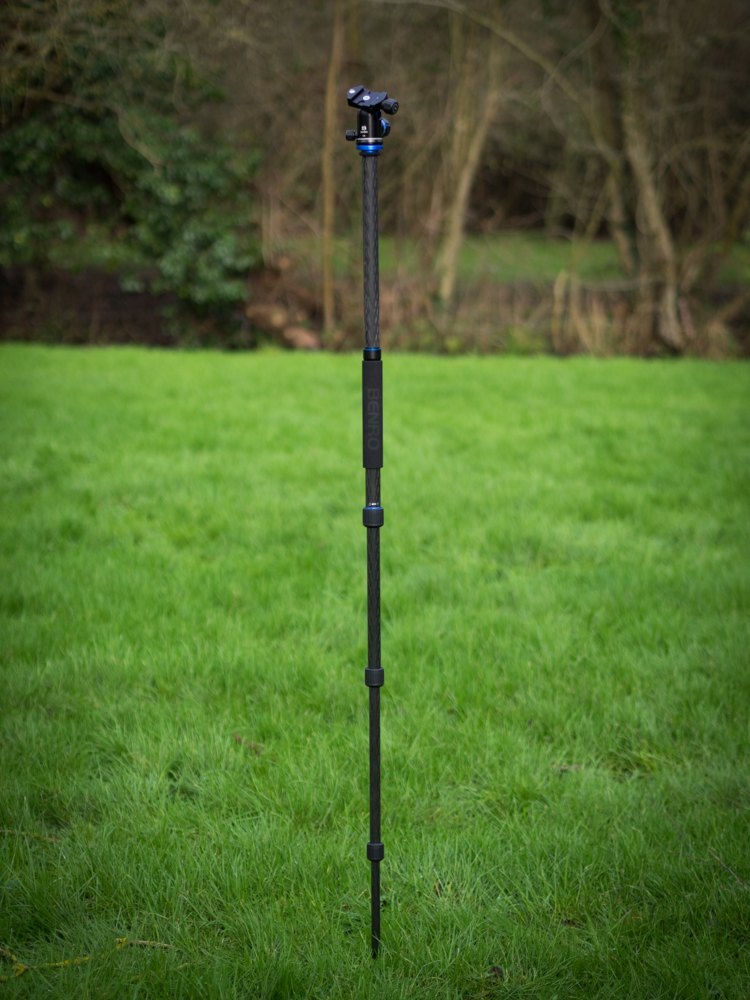
MONOPOD
If you are someone who uses a monopod then Benro give you an extremely competent one which is quick and easy to set up. Simply unscrew the designated leg, remove the centre column and screw the 2 together and hey presto, you have yourself a six foot monopod complete with ball head. I’m not a big user of monopods but I have given this a try and as well as being quick and easy to set up it makes for a very usable monopod.
The monopod is quick and easy to assemble
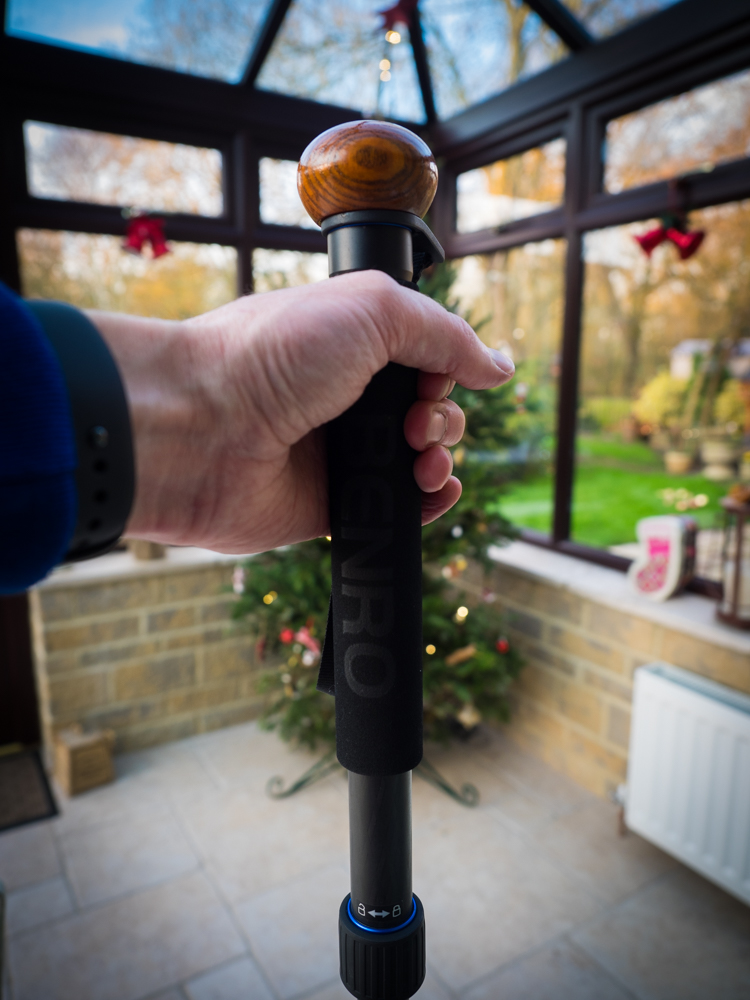
WALKING STICK
Ok, so far I have loved everything about this tripod but there was bound to be something that frustrated me and here it is. Benro have included a feature that is both excellent and frustrating in equal measure. With the inclusion of a simple wooden knob and a wrist strap that attaches to the top of the detachable leg Benro allow the user to create a walking stick / hiking pole. But here’s the thing, why just the one? Why not include 2 wooden knobs, 2 wrist straps and make 2 legs detachable? That way you have a really useful set of hiking poles rather than a pretty gimmicky walking stick. I do a lot of hiking, most landscape photographers do, and I have often wrestled with whether or not to purchase a set of hiking poles but I have always been put off by having to carry them, as well as all my photography gear, if I am not using them. So I have never made the purchase and my knees probably suffer as a result.
With a very simple change of design Benro can save my knees and ease the weight in my backpack whilst I hike. So come on Benro, if you change one thing on the next iteration of the Travel Angel please make it this. I’ll wager I won’t be the only one who finds this extremely useful.
The addition of a wooden knob and and wrist strap to make a walking stick are a nice touch but unless there are 2 it seems a little gimmicky to me
CONCLUSION
Minor gripe about the walking stick aside this is a superb tripod that has rightly taken pride of place in my backpack. At an RRP of £299 it gets the balance between cost, weight, stability, ease of use and quality pretty much spot on and with a 5 year warranty you should have nothing to worry about as long as the Benro customer service is good.
I’ve tried travelling with larger tripods and I’ve tried travelling with smaller ones and have never been completely satisfied, but with the Travel Angel Benro appear to have delivered almost everything I need and it will be quite a tripod that dislodges this one from my backpack. I just hope that it is the next iteration with 2 hiking sticks that eventually does, then I’ll be a very happy chap.
The Travel Angel has now taken pride of place in my backpack and it will take some dislodging.